How to sell tickets with assigned seating
Draw the venue's seat map, connect each zone to a tier and publish. Buyers pick their seat on the map itself.
With a seat map, every ticket sold corresponds to a numbered seat: the buyer picks the seat on the map, on the event page, and that seat is held for them alone. You draw the map once, save it as a template and reuse it for every event at that venue.
How it works
A map is made of zones. Each zone sells through its own tiers (labelled lots in the dashboard), so price, quantity, coupons, per-CPF limits and sales windows keep working as in any other event. What changes is that, in a seated zone, the tier's quantity is the number of seats, and every sale takes a specific seat.
| Concept | What it is |
|---|---|
| Map template | The venue drawing, kept under Seat maps. It is reusable and belongs to your organization. |
| Event map | The copy of the template the event receives when you add it. Prices, blocked seats and sales live there. |
| Zone | A block of the map. It can be Seated (numbered rows), Standing (a capacity, no seats) or Accessible (seats with wider spacing). |
| Zone tier | The tier a zone sells through. A zone can have more than one. |
| Designation | What a seat is: Regular, Wheelchair, Reduced mobility, Obese-suitable or Companion. |
Step 1: draw the map
The map is part of the event creation wizard, in the Map step, right after Info.
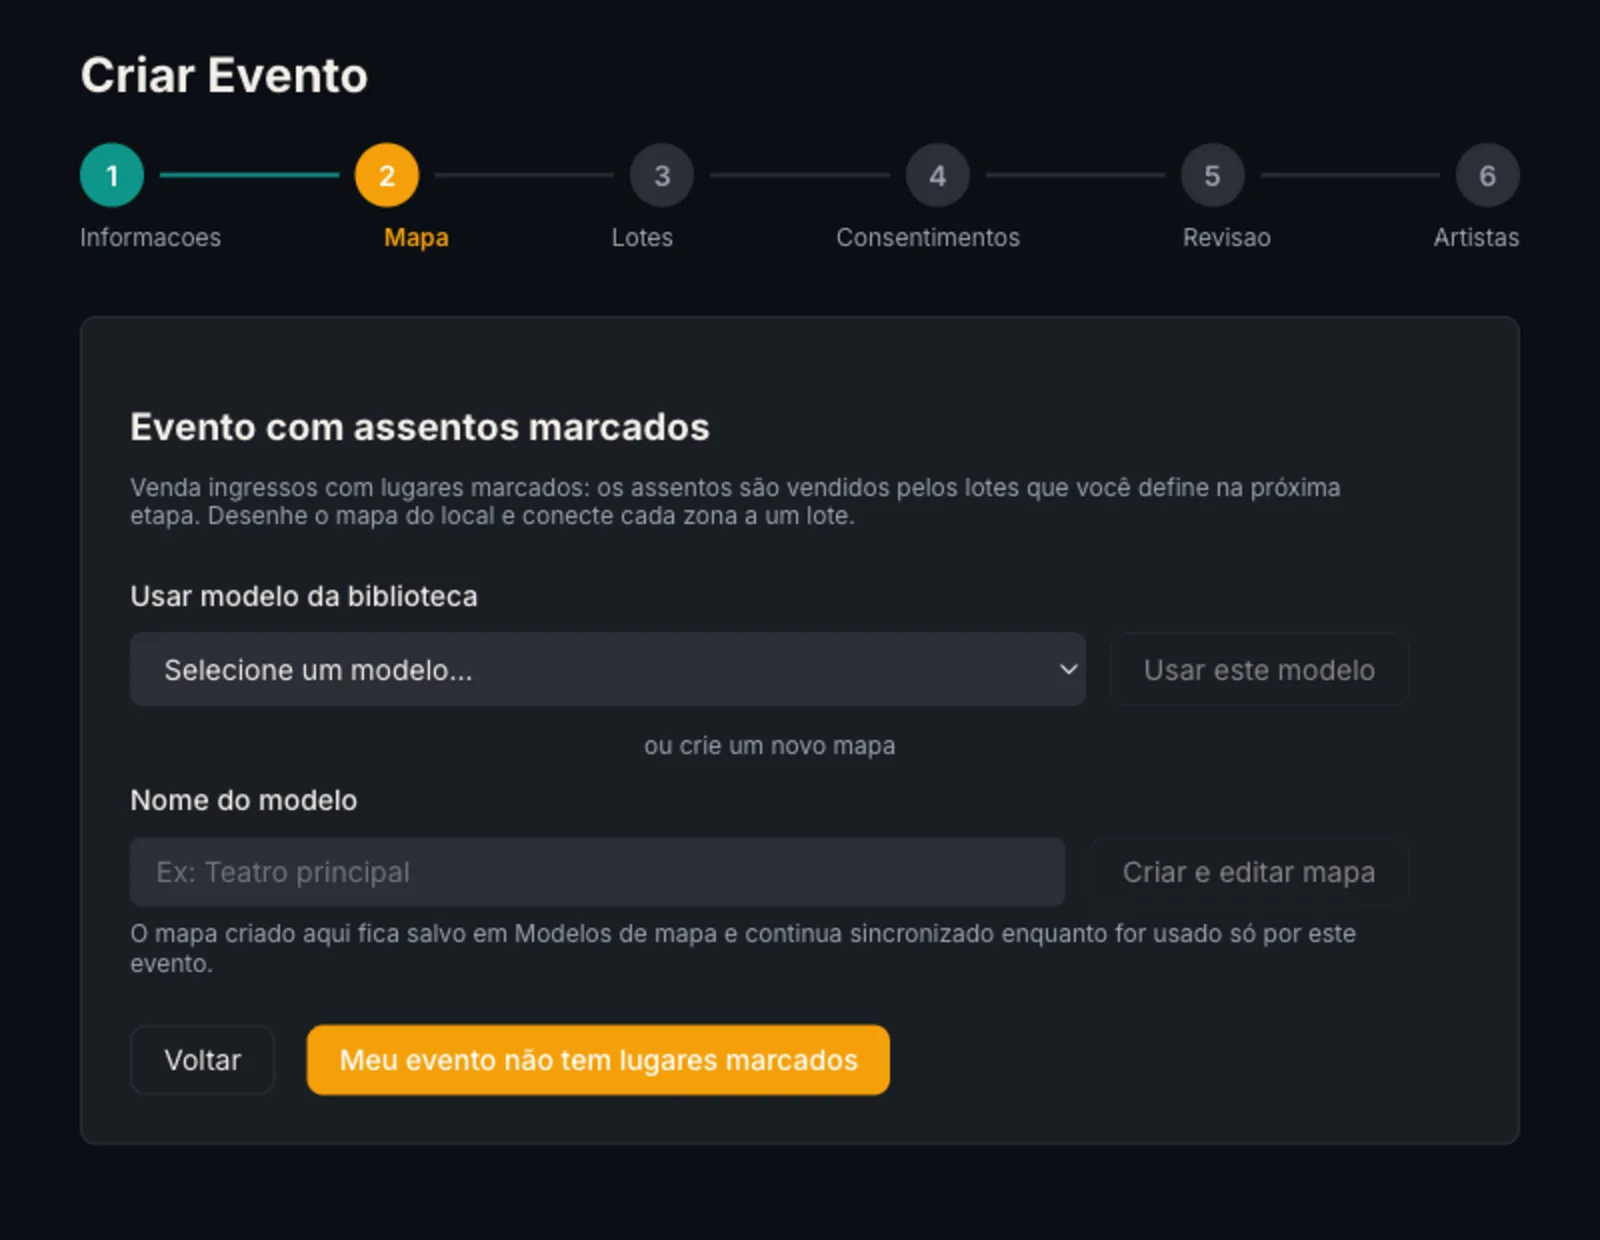
In the dashboard, click Events → Create event, fill in the Info step and click Next.
In the Map step, choose a path. Use a library template → Use this template adds a copy of a map you have already drawn. Create and edit map, with a name, opens the editor on a blank map; that map is also saved under Seat maps and stays in sync with the event for as long as only this event uses it. If the event has no assigned seats, click My event doesn't have marked seats and move on to the tiers.
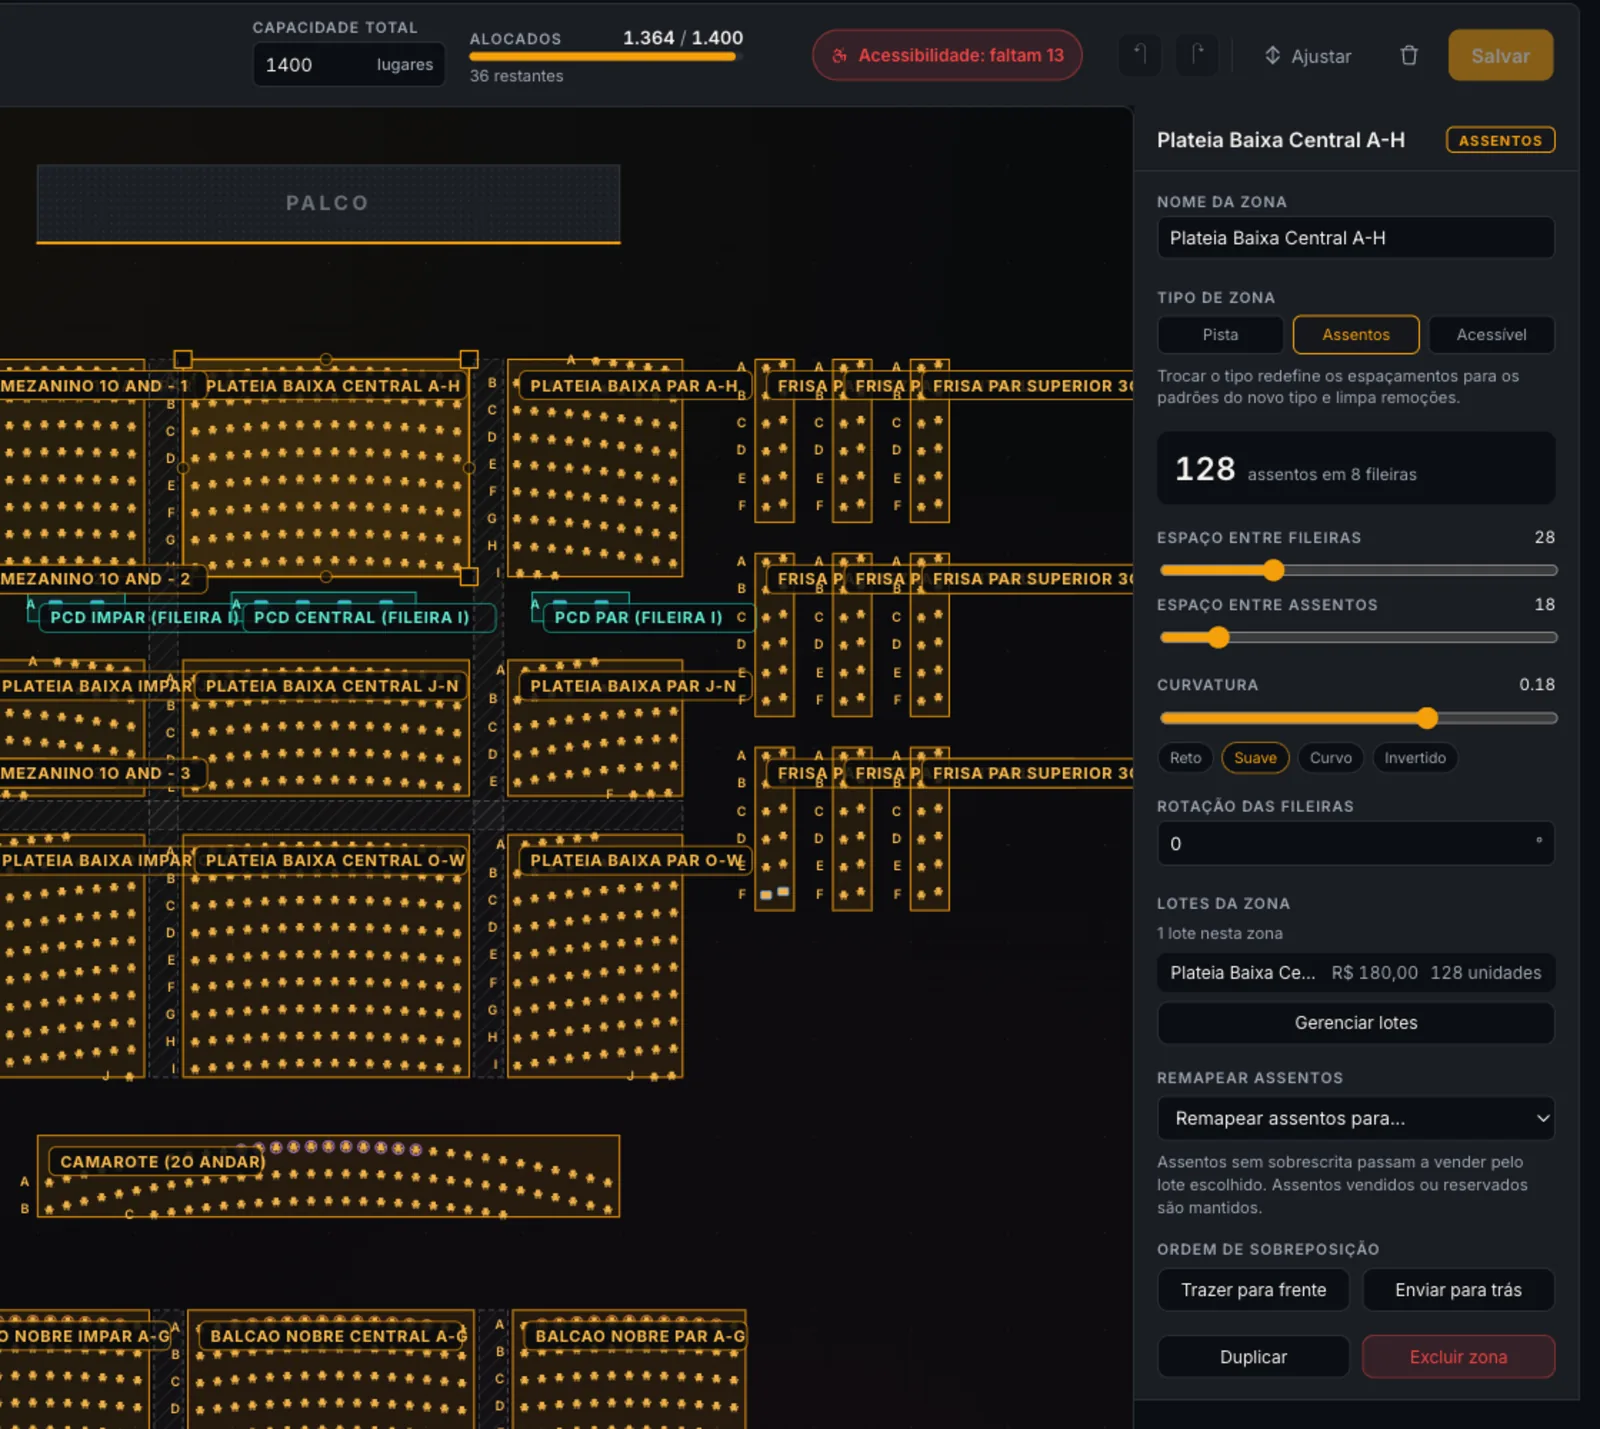
In the editor, draw by dragging rectangles on the canvas with the tools on the left: Stage, Standing, Seated, Accessible and Aisle. A Seated rectangle becomes numbered rows from A onwards, and the panel on the right shows how many seats and rows it holds. There you also set the zone name, the row spacing and seat spacing, the curvature (Flat, Gentle, Curved, Inverted) and the row rotation. The top bar shows the allocated places against the total capacity.
Click Save, then Back to return to the wizard. Row letters and seat numbers are generated for each block; if the venue numbers odd and even sides separately, draw one block per side and name the zones accordingly.
One template per venue
Keep one template per venue under Seat maps (side menu) and use + New template to add more. Editing a template does not change events that already received it: each event edits its own copy, and seats already sold never move.
Step 2: set each zone's tiers
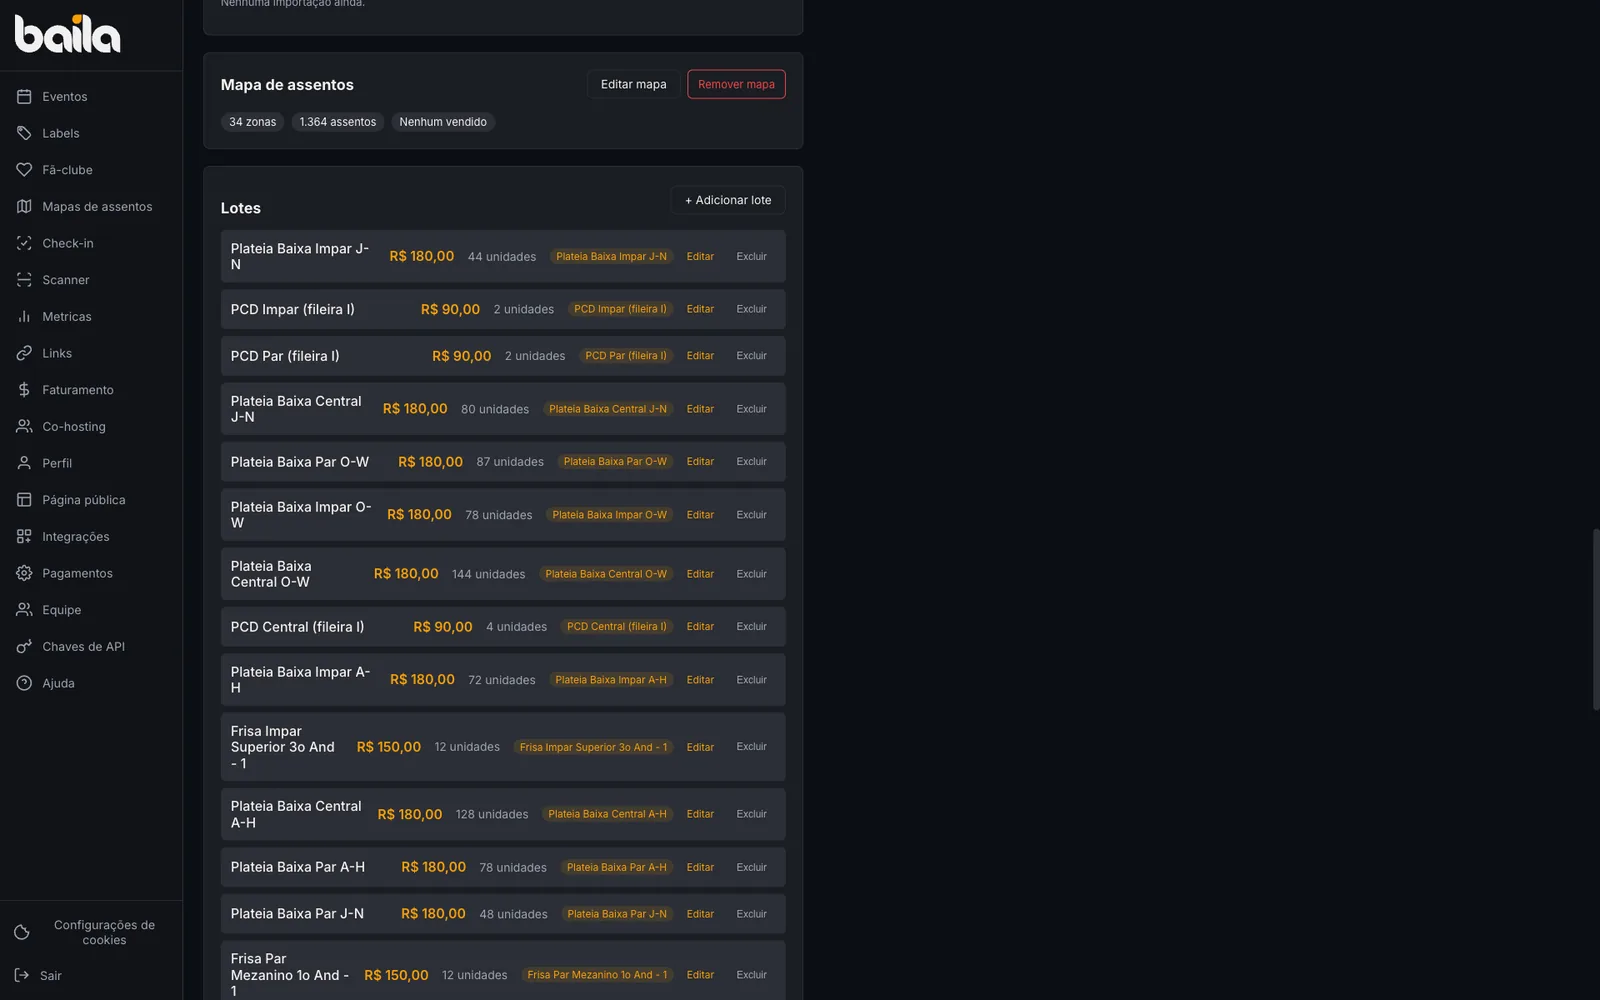
When the map is added, Baila creates one draft tier per zone, named after the zone and with a quantity equal to its seat count. A draft tier is invisible to buyers, and a zone with no active tier shows on the map as not for sale, never as sold out.
In the wizard's Tiers step, Baila lists the tiers created by the map and asks only for each one's price. Leave Put all on sale when publishing checked to activate them all at once.
To adjust a tier later, open the event and use Tiers → Edit. In an event with a map, every tier has a Map zone field. In Seated and Accessible zones the quantity is derived from the zone's seats and cannot be typed. In Standing zones you set each tier's quantity, and the zone's tiers cannot add up to more than its standing capacity.
To charge different prices inside the same zone (full and half price, for instance), create another tier with + Add tier in the same zone. To sell a row or a few seats through another tier, select the seats in the event's map editor and pick the Seat tier: that overrides the zone's tier for those seats only. Remap seats moves every non-overridden seat of the zone to another tier; sold or held seats stay where they are.
Tier warnings
The editor shows a tier warnings counter when a zone has no active tier or a tier belongs to no zone of the map. Warnings orient and never block saving; fix them in the event's Tiers section.
Step 3: mark the accessible seats
Brazilian law requires wheelchair spaces and seats for people with reduced mobility and obese people in proportion to capacity (Decree 5.296/2004, art. 23). The Accessible tool only widens a zone's spacing; what counts towards the quota is each seat's designation.
In the editor, click a seat, or drag on empty space to select several, and pick the Designation: Wheelchair, Reduced mobility, Obese-suitable or Companion. The Companion seat sits next to the wheelchair space; the pairing is set on the event map, after the template is added.
Watch the Legal accessibility quota meter at the top of the editor. It compares what you marked with what the law requires for the total number of places (seats plus standing), category by category, and lists what the law also requires and only the drawing can guarantee: a companion next to each space, distribution across sectors, visibility and proximity to exits.
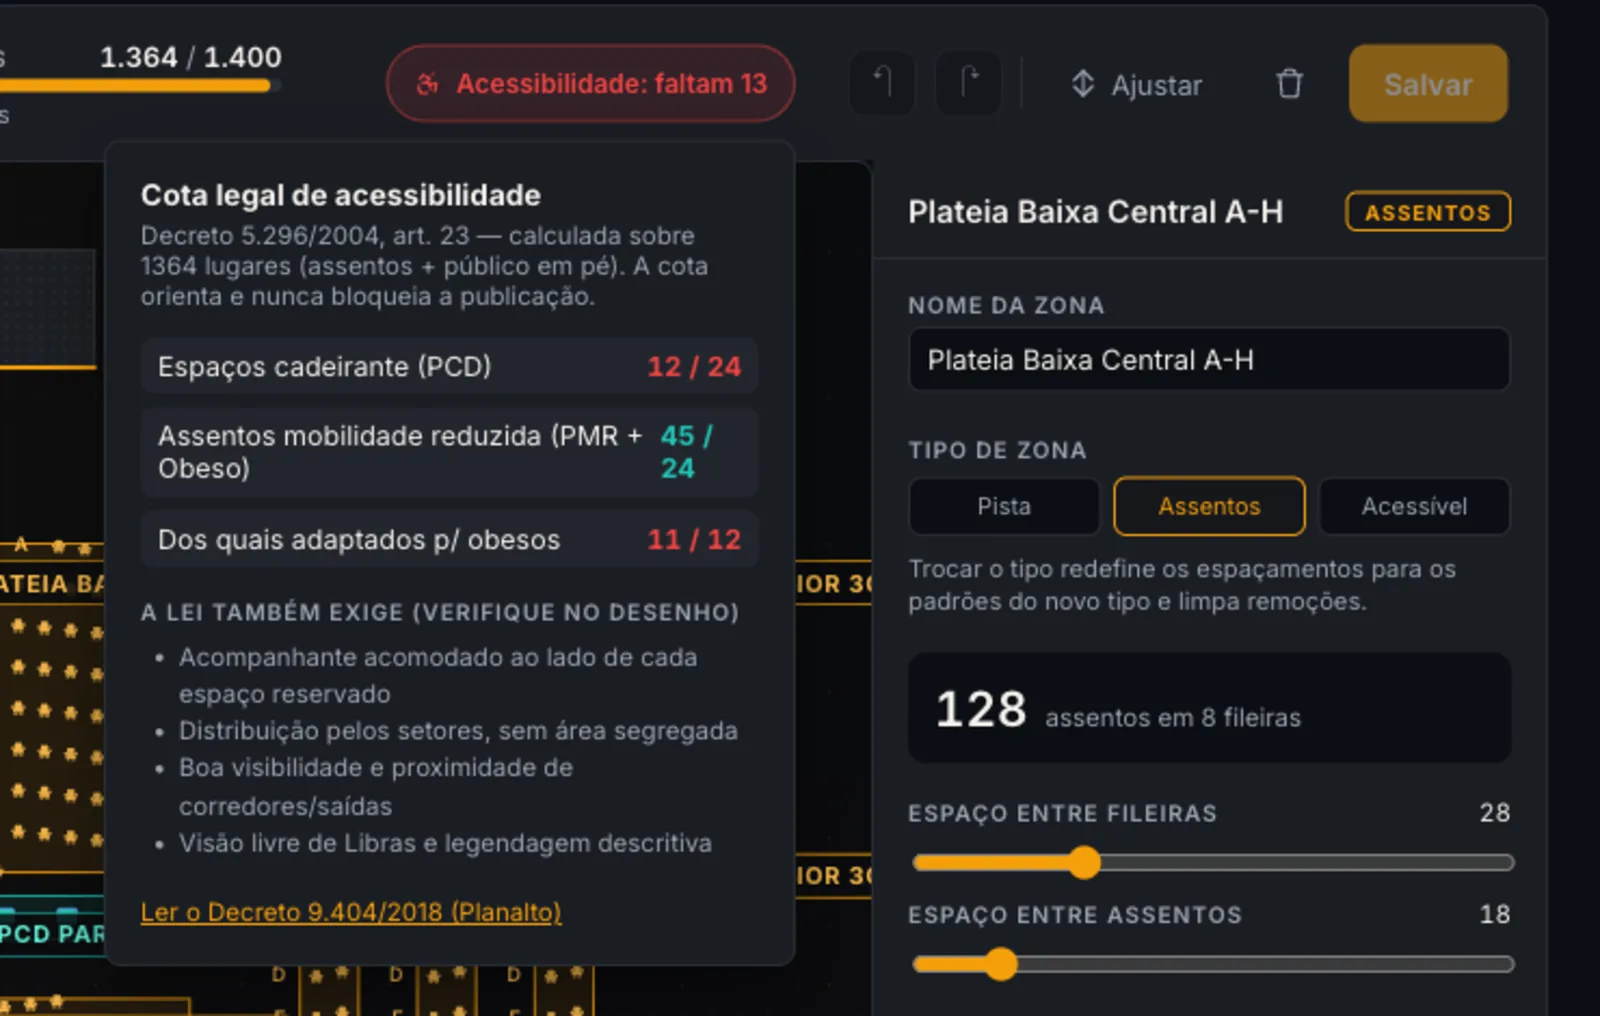
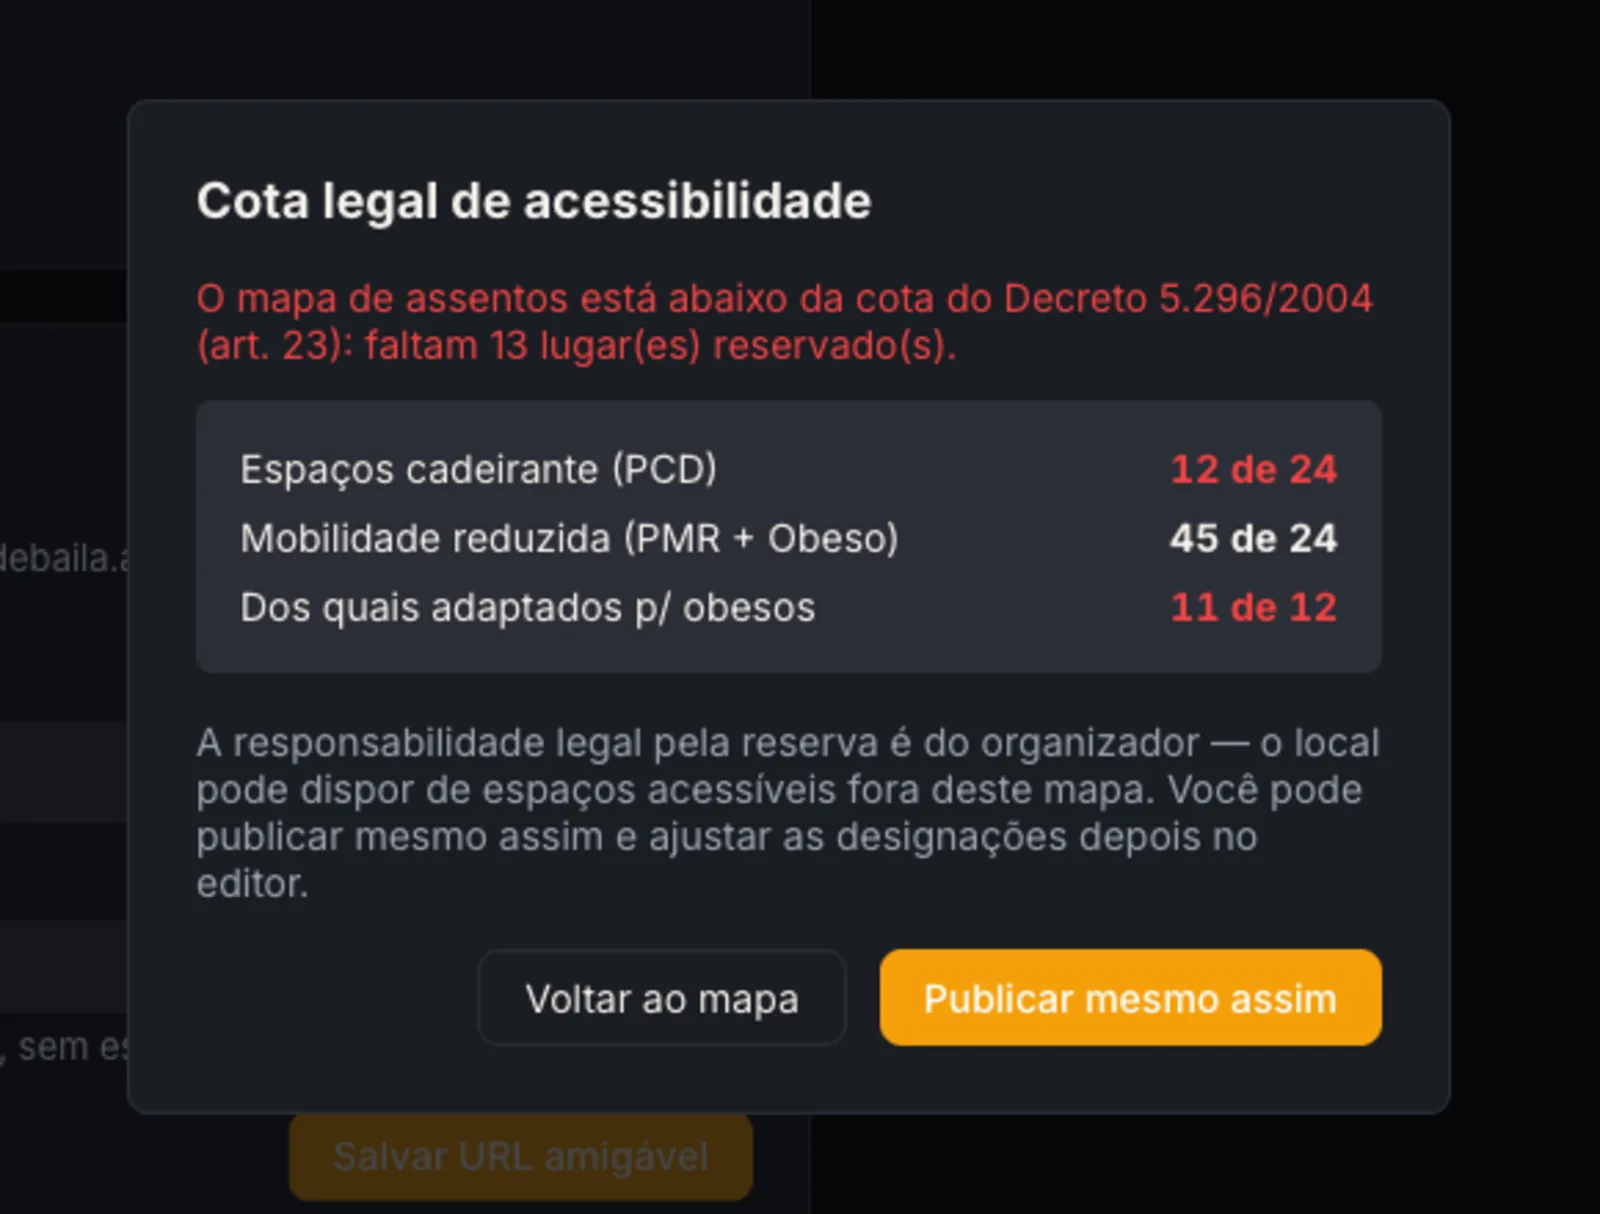
The quota orients and never blocks. If the map is below it when you publish, Baila shows what is missing and lets you go back to the map or publish anyway, because the venue may provide accessible spaces outside the map and the legal responsibility for the reservation is the organizer's. Close to the event, the editor also warns if you redesignate accessible seats before the date the law allows them to be released.
What changes after the first sale
- A sold seat does not move. You can keep adjusting the drawing, but sold or held seats cannot be deleted: on save, the editor highlights them and refuses the removal. Remove map stops being available as soon as there is a sale.
- Operational state. To take a seat off sale without deleting it, select it on the event map and mark it Blocked or Out of service. Buyers see it as unavailable. Use the Note field to record the reason, such as a partial view of the stage.
- Activate after the previous tier sells out is not available in Seated and Accessible zones, because a seat cannot change tier. Use that activation mode in Standing zones.
- Importing attendees only works on tiers without assigned seats. Create a standing tier for that.
- Duplicate event copies neither the map nor the tiers. On the copy, add the template again in the Seat map section and set the prices.
- Recurring events copy the map to every date in the series, along with the tiers. See How to create recurring events.
Current limits
- Row letters and seat numbers are generated for each block and cannot be edited.
- The total capacity is calculated from the places you draw.
- Each map has one stage. Different floors (balcony, mezzanine) are drawn on the same plane, one below the other.
Related articles
How to create ticket tiers
How to publish, pause, and end an event
How to create recurring events (classes and series)
Updated on 2026-10-14